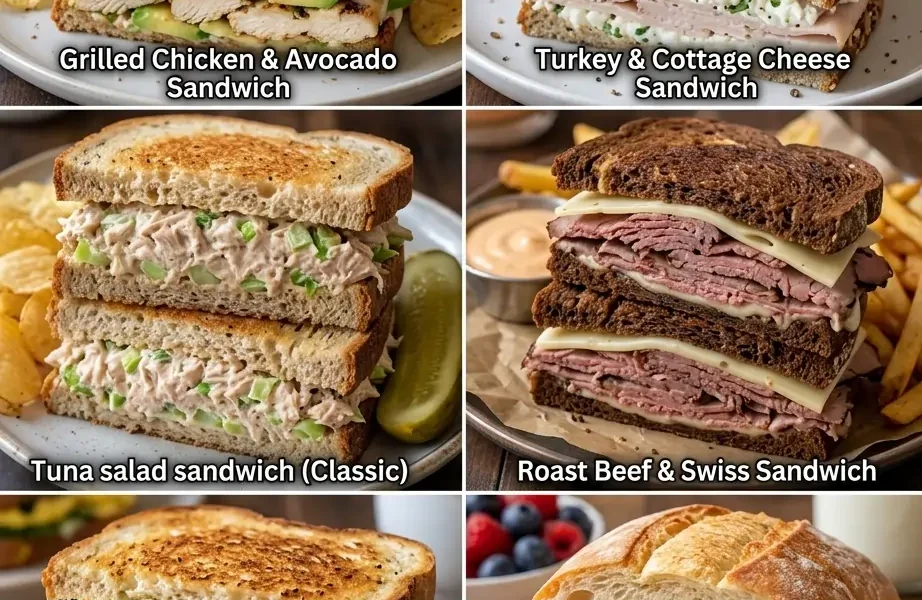
If you’re looking for sandwiches that are high in protein and filling, these are six of the best options
1. Grilled Chicken & Avocado Sandwich
Looking for a lunch that feels like a treat but keeps you feeling fueled and energized all afternoon? This Grilled Chicken & Avocado Sandwich hits every single note. It combines juicy, herb-marinated grilled chicken breasts with a rich, creamy avocado spread, crisp tomatoes, and fresh greens.
Whether you whip this up on an outdoor grill or a indoor grill pan, it is a simple, satisfying meal that tastes like it came straight from a gourmet deli.
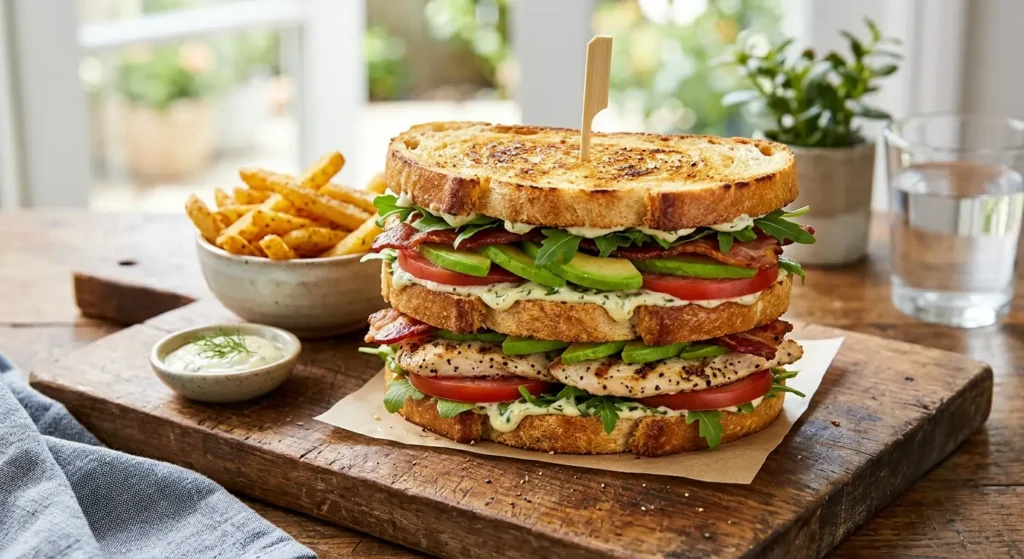
Why You’ll Love This Recipe
- Perfect Texture Balance: Crispy toasted bread meets juicy chicken and velvety mashed avocado.
- Meal-Prep Friendly: You can grill the chicken ahead of time, making weekday lunch assembly a breeze.
- Naturally High-Protein: Loaded with clean protein to keep you full and satisfied.
Ingredients You’ll Need
For the Chicken & Marinade
- 2 large chicken breasts (sliced horizontally into thin cutlets for fast, even cooking)
- 1 tbsp olive oil
- 1 tbsp lemon juice (freshly squeezed)
- 1 tsp garlic powder
- 1 tsp dried oregano or Italian seasoning
- Salt and black pepper to taste
For the Sandwich Assembly
- 1 ripe avocado
- 1 tsp lemon juice (keeps the avocado vibrant green)
- 4 slices of your favorite bread (sourdough, gluten-free, or low-carb options all work beautifully)
- 1 large tomato, sliced
- 1 cup fresh greens (arugula or spinach add a lovely peppery crunch)
Step-by-Step Instructions
The secret to keeping the chicken incredibly juicy is a quick marinade and high heat. This locks in the juices so your sandwich stays perfectly moist.
1.Marinate the chicken:10-15 min.
In a shallow dish, toss the chicken cutlets with olive oil, lemon juice, garlic powder, oregano, salt, and pepper. Let it sit at room temperature while your grill heats up.
2.Grill to perfection:8-10 min.
Heat your grill or grill pan over medium-high heat. Grill the chicken for 4 to 5 minutes per side. Ensure the internal temperature reaches 165°F (74°C). Transfer to a plate and let it rest for 5 minutes before slicing.
3.Prepare the creamy avocado spread:3 min.
While the chicken rests, mash the ripe avocado in a small bowl with a splash of lemon juice, a pinch of salt, and a dash of pepper until relatively smooth.
4.Toast and assemble:5 min.
Toast your bread slices until golden brown. Spread a generous layer of the mashed avocado onto the bottom slices. Layer on the sliced tomatoes, the grilled chicken cutlets, and top with fresh greens before closing the sandwich.
Pro-Tips for the Perfect Sandwich
Let the chicken rest: Cutting into the chicken immediately after it leaves the grill will cause all those delicious juices to run out onto your cutting board, leaving you with dry meat. Give it 5 minutes to rest!
- Add a kick: If you like heat, mix a little chipotle aioli or a pinch of red pepper flakes right into your avocado spread.
- Keep it fresh: If you are packing this for lunch later, store the grilled chicken, sliced tomatoes, and avocado spread in separate airtight containers and assemble just before eating to keep the bread perfectly crisp.
High-Protein Turkey & Cottage Cheese Sandwich
If you are looking for a way to upgrade your lunch routine while keeping things lean and packed with protein, this Turkey & Cottage Cheese Sandwich is a total game-changer.
While putting cottage cheese on a sandwich might sound unconventional at first, it acts as a brilliant, high-protein alternative to traditional mayo or sliced cheese. It adds an incredible creaminess that pairs perfectly with savory smoked turkey, crisp veggies, and a hint of tangy mustard.
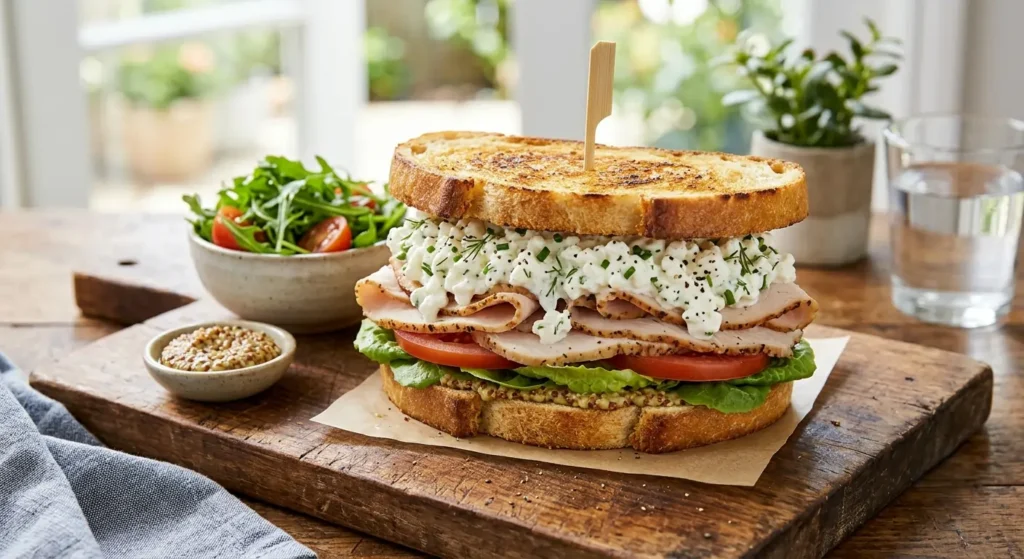
Why This Combination Works
- Protein Powerhouse: Combining lean turkey breast with cottage cheese gives you a massive protein boost to keep you full for hours.
- The Perfect Texture: Thick-cut, toasted artisan bread holds up beautifully against the creamy cottage cheese and crisp lettuce.
- Low Effort, High Reward: No cooking required—just a quick assembly for a gourmet, macro-friendly lunch.
Ingredients You’ll Need
- 4 slices of your favorite bread (sourdough, whole grain, or your favorite low-carb variety)
- 6–8 oz high-quality deli turkey breast (smoked or oven-roasted)
- 1/2 cup full-fat or 2% cottage cheese (small curd works best for spreading)
- 1 tbsp fresh chives or dill, finely chopped (to mix into the cottage cheese)
- 1 large tomato, sliced
- Fresh greens (like crisp romaine or peppery arugula)
- 1 tbsp stone-ground or Dijon mustard
- Salt and freshly cracked black pepper to taste
Step-by-Step Instructions
The key to a flawless cottage cheese sandwich is all in the layering. By prepping the cheese and protecting the bread, you get all the creaminess without any sogginess.
1.Season the cottage cheese: (2 min)
In a small bowl, mix the cottage cheese with your freshly chopped chives or dill. Season with a generous pinch of freshly cracked black pepper and a tiny pinch of salt.
2.Toast the bread: (2 min)
Toast your bread slices until they are beautifully golden and crisp. This creates a sturdy structural barrier that prevents the sandwich from getting soggy.
3.Apply the base layers: (1 min)
Spread a thin layer of stone-ground or Dijon mustard on the bottom slices of bread. Layer on your fresh greens and sliced tomatoes first—this also helps protect the bread from moisture.
4.Stack and serve: (2 min)
Drape the sliced turkey over the tomatoes, creating a nice textured bed. Spoon the seasoned cottage cheese generously right on top of the turkey. Close the sandwich with the top slice of bread, press down gently, and slice it in half.
Pro-Tips for Success
Control the moisture: If your cottage cheese seems exceptionally wet, you can strain it through a fine-mesh sieve for a few minutes, or blend it in a small food processor beforehand to create a thick, whipped spread that stays exactly where you put it.
Make it warm: Want a hot sandwich? Layer the turkey and tomato on the bread, pop it under the broiler for 2 minutes to warm through, and then top it with the cold, creamy cottage cheese right before serving.
Add some crunch: Sliced cucumbers, pickled red onions, or alfalfa sprouts make fantastic additions to elevate the crunch factor.
3. The Classic & Crispy Tuna Salad Sandwich
When you need a quick, dependable lunch that never fails to satisfy, nothing competes with a classic Tuna Salad Sandwich. It is the ultimate pantry staple meal—turning a few simple ingredients into something rich, savory, and incredibly comforting.
The secret to a truly spectacular tuna sandwich lies in the contrast: a creamy, well-seasoned tuna salad paired with plenty of crisp, crunchy elements, all tucked between perfectly toasted bread.
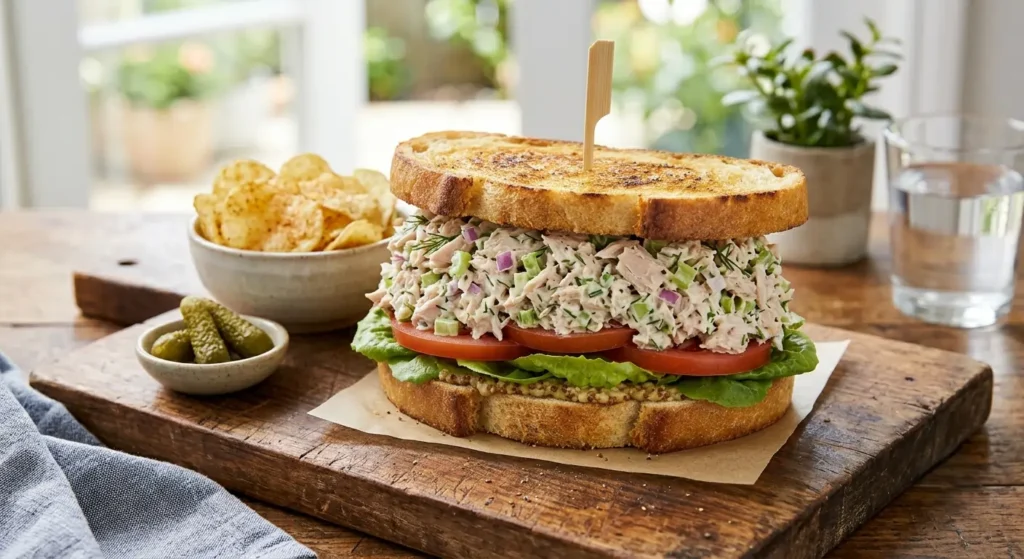
Why You’ll Love This Recipe
- Pantry Staple Hero: Made primarily with ingredients you likely already have on hand in your kitchen.
- Ultimate Crunch: Packed with celery and red onion to give you the perfect texture in every single bite.
- Customizable: Easy to adapt whether you like it extra tangy, slightly sweet, or packed with fresh herbs.
Ingredients You’ll Need
- 2 cans (5 oz each) albacore tuna in water, drained well
- 1/3 cup high-quality mayonnaise
- 1 stalk celery, finely diced (for that essential crunch)
- 2 tbsp red onion, finely minced
- 1 tbsp fresh dill or parsley, chopped
- 1 tbsp lemon juice (freshly squeezed to brighten up the flavors)
- 1 tsp Dijon mustard
- Salt and freshly cracked black pepper to taste
- 4 slices of your favorite bread (sourdough, rye, or whole wheat work beautifully)
- Optional toppings: Crisp romaine lettuce, sliced tomatoes, or bread-and-butter pickles
Step-by-Step Instructions
Achieving the perfect texture is all about draining the tuna thoroughly and building layers that protect your bread from getting soggy.
1.Drain the tuna thoroughly:2 min.
Open your cans of tuna and drain the water completely. Press down firmly on the lid or use a fine-mesh strainer to squeeze out excess moisture so your salad stays thick and creamy.
2.Mix the salad base:3 min.
In a medium bowl, combine the flaked tuna, mayonnaise, finely diced celery, minced red onion, fresh herbs, lemon juice, and Dijon mustard. Stir until completely combined, then season to taste with salt and pepper.
3.Toast your bread:2 min.
Toast your bread slices to your desired level of crispness. A sturdy, golden-brown toast ensures your sandwich holds up beautifully under the generous filling.
4.Assemble and serve:2 min.
Place a crisp leaf of romaine lettuce on the bottom slices of bread—this acts as a natural moisture barrier. Spoon a generous amount of the tuna salad on top of the lettuce, add sliced tomatoes or pickles if desired, and close with the top slice of bread.
Pro-Tips for the Best Tuna Salad
Make it ahead: Tuna salad actually tastes better after sitting in the fridge for an hour or two. This gives the flavors time to meld together and the onions to mellow out slightly.
- Turn it into a Tuna Melt: If you want a warm, comforting twist, leave the top slice of bread off, place a slice of cheddar or provolone cheese over the tuna salad, and pop it under your oven’s broiler for 2 to 3 minutes until the cheese is bubbly and melted.
- Lighten it up: Swap half of the mayonnaise for plain Greek yogurt or mashed avocado for a tangier, lighter alternative that still delivers incredible creaminess.
4. Roast Beef & Swiss Sandwich
When you want a sandwich that feels hearty, deeply savory, and completely satisfying, a Roast Beef & Swiss Sandwich is the ultimate choice. It is a classic deli combination that brings together rich, thinly sliced roast beef with the mild, nutty melted goodness of Swiss cheese.
While it is incredible served cold, taking a few extra minutes to warm the beef and melt the cheese elevates this sandwich into a comforting, gourmet masterpiece.
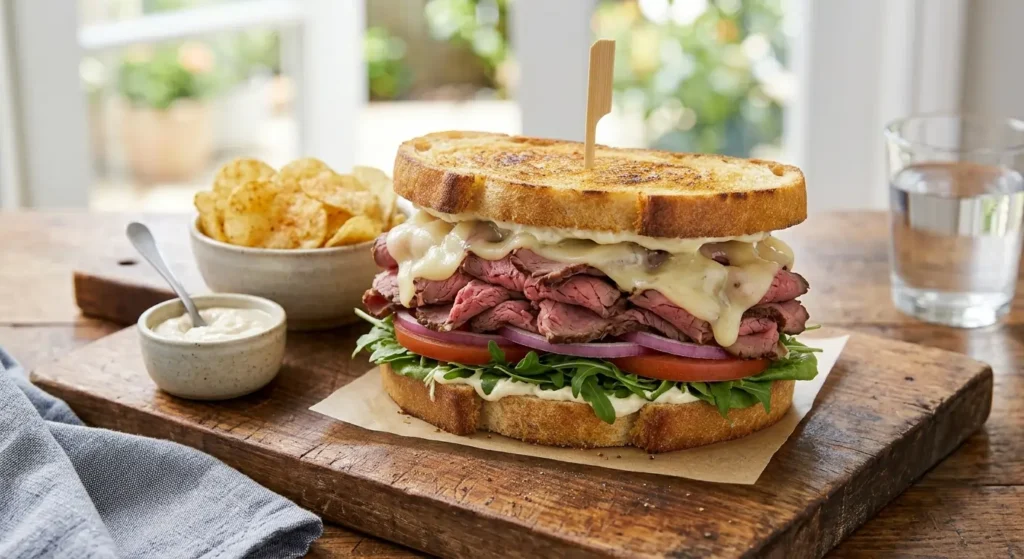
Why You’ll Love This Recipe
- Bold Flavor Profile: The combination of savory beef, sharp mustard, and nutty Swiss cheese creates a perfect balance of flavors.
- Warm and Comforting: A quick turn under the broiler or in a panini press transforms simple ingredients into comfort food perfection.
- Pub-Style Quality at Home: It tastes exactly like something you’d order at a high-end bistro or local pub, but is made in minutes.
Ingredients You’ll Need
- 4 slices of sturdy artisan bread (rye, pumpernickel, or a thick sourdough work beautifully)
- 6–8 oz deli roast beef, thinly sliced (rare or medium-rare offers the best flavor)
- 4 slices Swiss cheese
- 1 tbsp Dijon mustard or horseradish mayo (for that essential tangy kick)
- 1/2 small red onion, thinly sliced
- Fresh greens (like arugula or crisp romaine lettuce)
- 1 tbsp butter (if toasting on a skillet or panini press)
- Salt and freshly cracked black pepper to taste
Step-by-Step Instructions
To get the most out of this sandwich, we recommend serving it warm so the Swiss cheese gets perfectly gooey and binds the layers together.
1.Prep the bread and spreads:2 min.
Lay out your slices of bread. Spread a generous layer of Dijon mustard or horseradish mayo across the bottom slices. This sharp creaminess cuts right through the richness of the roast beef.
2.Layer the beef and cheese:3 min.
Ribbon the thinly sliced roast beef on top of the spread—folding the meat rather than laying it flat creates a lighter, better texture. Top the beef immediately with the slices of Swiss cheese so it can melt into the meat.
3.Melt and toast:4 min.
Skillet Method: Butter the outside of the bread and grill in a skillet over medium heat for 3 to 4 minutes per side until the bread is golden and the cheese is melted.
Broiler Method: Leave the sandwich open-faced and pop it under the oven broiler for 2 minutes until the cheese is bubbling, then close the sandwich.
4.Add fresh finishes:1 min.
Gently open the sandwich to tuck in your fresh greens and thinly sliced red onions. The contrast of the cool, crisp veggies against the warm beef and melted cheese is spectacular. Slice diagonally and serve immediately.
Pro-Tips for the Ultimate Roast Beef Sandwich
Level up with caramelized onions: If you have an extra 10 minutes, swap the raw red onions for slow-cooked caramelized onions. The sweetness pairs magnificently with the savory roast beef.
- Want an au jus twist? Serve this sandwich with a small side of warm beef broth (au jus) or french onion soup for dipping.
- Keep it sharp: Roast beef can handle strong flavors. Don’t be afraid to use a true, coarse-ground vertical grain mustard or a heavy hand of horseradish to make the flavors pop.
5. Egg & Spinach Protein Sandwich
When you need a morning boost that fuels your busy day without slowing you down, a warm, savory breakfast sandwich is the ultimate solution. This Egg & Spinach Protein Sandwich is designed to deliver a clean, high-protein punch wrapped in a comforting, deli-style package.
By combining fluffy, protein-packed eggs with nutrient-dense fresh spinach and a hint of melty cheese, you get a gourmet breakfast that takes less than 10 minutes to make but keeps you completely satisfied until lunch.
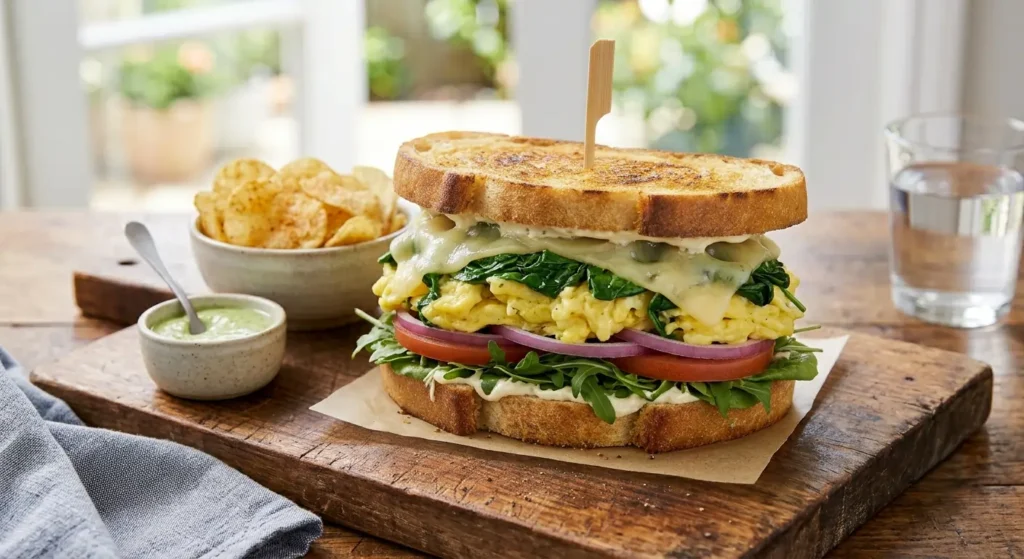
Why You’ll Love This Recipe
- Macro-Friendly Fuel: Loaded with high-quality protein and essential vitamins to start your morning right.
- Warm and Gooey: Soft-scrambled or folded eggs meet perfectly wilted spinach and melty cheese on crisp, toasted bread.
- Fast Weeknight Dinner Too: It’s so quick and satisfying, it pulls double duty for those lazy “breakfast-for-dinner” nights.
Ingredients You’ll Need
- 2 large eggs (or 1 whole egg and 2 egg whites for a leaner protein option)
- 1 large handful fresh baby spinach
- 2 slices of sturdy artisan bread (sourdough, whole grain, or your favorite low-carb, high-protein bread)
- 1 slice of cheese (provolone, Swiss, or sharp cheddar work beautifully)
- 1 tsp olive oil or butter (for the skillet)
- 1 tbsp cream cheese or hot sauce (optional, for a little extra kick or creaminess)
- Salt and freshly cracked black pepper to taste
Step-by-Step Instructions
The secret to a great egg sandwich is keeping the eggs light and fluffy while ensuring the spinach is perfectly wilted but not watery.
1.Whisk and prep:2 min.
Crack your eggs into a small bowl, season with a pinch of salt and freshly cracked black pepper, and whisk vigorously with a fork until smooth and slightly frothy. Toast your bread slices in a toaster until golden and crisp.
2.Wilt the spinach:2 min.
Heat the olive oil or butter in a small non-stick skillet over medium heat. Add the fresh baby spinach and sauté for about 1 to 2 minutes just until it begins to wilt and shrink.
3.Cook the eggs:3 min.
Pour the whisked eggs directly over the wilted spinach in the skillet. Using a spatula, gently draw the edges inward to form a cohesive, folded omelet shape that matches the size of your bread. Just before the top is completely set, place your slice of cheese on top, turn off the heat, and cover with a lid for 1 minute to let the cheese melt.
4.Assemble and serve:1 min.
If desired, spread a thin layer of cream cheese or a dash of hot sauce onto your toasted bread. Slide the cheesy egg and spinach fold onto the bottom slice of bread, top with the remaining slice, and cut in half to serve warm.
Pro-Tips for Breakfast Success
Avoid soggy bread: Spinach holds a lot of moisture. By cooking it quickly first and letting any excess steam escape before folding it into the eggs, you ensure your sandwich stays perfectly crisp and structurally sound.
- Add some healthy fats: A few thin slices of fresh avocado or a layer of pesto spread on the toast elevates the flavor profile to a cafe-level experience.
- Meal prep shortcut: You can bake a batch of spinach and egg patties in a muffin tin or a square baking dish ahead of time, freeze them, and simply reheat one in the toaster oven or microwave on busy mornings.
6. High-Protein Tofu & Tempeh Sandwich
If you think plant-based sandwiches can’t be just as hearty, savory, and protein-packed as their deli counterparts, this Tofu & Tempeh Sandwich is here to completely change your mind.
By combining the crispy, smoky crunch of marinated tempeh strips with a tender, golden-pan-seared tofu cutlet, you get a double dose of high-quality plant protein in every single bite. Toss in a creamy spread and some fresh, crisp greens, and you have a gourmet vegan sandwich that will keep you completely satisfied and energized all afternoon.
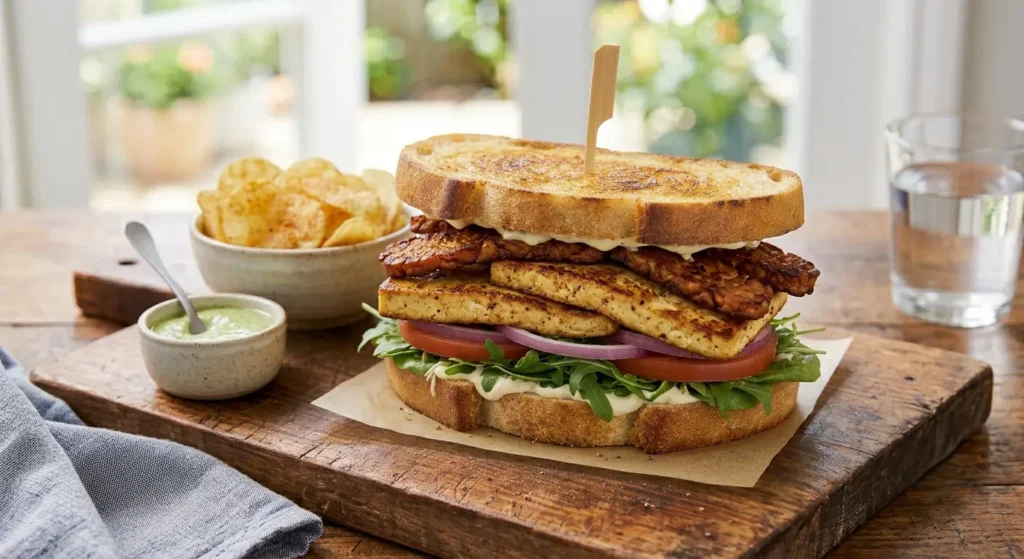
Why This Combination Works
- The Ultimate Texture Match: The contrast between the tender, juicy interior of the seared tofu and the firm, distinct crunch of the tempeh creates an incredibly satisfying mouthfeel.
- Deeply Savory Flavor Profile: Smoky, umami-rich marinades turn these simple soy proteins into a deeply savory experience that rivals any classic club sandwich.
- Nutrient & Protein Dense: A fantastic option for anyone looking to smash their protein goals with a clean, plant-forward meal.
Ingredients You’ll Need
For the Smoky Protein Base
- 4 oz extra-firm tofu (pressed and sliced into a thick cutlet)
- 3–4 strips of tempeh
- 1 tbsp olive oil (for cooking)
For the Easy Umami Marinade
- 1 tbsp soy sauce or liquid aminos
- 1 tsp maple syrup or your favorite low-carb sweetener
- 1/2 tsp smoked paprika
- 1/2 tsp garlic powder
- A dash of liquid smoke (optional, for that authentic deli-counter finish)
For the Sandwich Assembly
- 4 slices of sturdy artisan bread (sourdough, rye, or your favorite high-protein variety)
- 2 tbsp avocado oil mayonnaise or vegan mayo
- 1 tsp Dijon mustard
- 1 large tomato, sliced
- Fresh greens (like crisp romaine or peppery arugula)
- Salt and freshly cracked black pepper to taste
Step-by-Step Instructions
The trick to a phenomenal plant-based sandwich is removing excess moisture from the tofu so it can absorb maximum flavor and get beautifully golden in the pan.
1.Prep and marinate:5 min.
Wrap your tofu slice in a clean kitchen towel or paper towels and press gently to remove excess water. In a shallow dish, whisk together the soy sauce, maple syrup, smoked paprika, garlic powder, and liquid smoke. Place the tofu cutlet and tempeh strips in the marinade, flipping to coat both sides evenly.
2.Sear to golden perfection:6-8 min.
Heat the olive oil in a non-stick skillet over medium-high heat. Add the marinated tofu and tempeh to the pan. Cook for 3 to 4 minutes per side, until the tempeh is crisp and the tofu has a beautiful, golden-brown crust. Spoon any remaining marinade over them during the last minute of cooking.
3.Toast and prep the spreads:2 min.
While your proteins are finishing up in the skillet, toast your bread slices until they are golden and sturdy. Mix your mayo and Dijon mustard together, and spread it generously across the bottom slices of toast.
4.Stack and serve:2 min.
Layer your crisp lettuce and sliced tomatoes onto the prepared bottom toast first to build a moisture barrier. Place the warm, seared tofu cutlet on top of the tomatoes, stack the crispy tempeh strips right on top of the tofu, and close the sandwich. Slice diagonally and enjoy immediately!
Pro-Tips for Success
Press your tofu ahead of time: If you have the time, pressing your tofu under a heavy skillet for 15 to 20 minutes before slicing makes it much firmer and allows it to develop an incredibly crisp, steak-like crust when seared.
- Add a creamy element: Sliced fresh avocado or a generous layer of homemade pesto pairs beautifully with the smoky flavor of the tempeh.
- Keep it extra crunchy: Try adding pickled red onions or a handful of alfalfa sprouts to give the sandwich an extra hit of brightness and crunch.