
 View Gallery
1 photo
View Gallery
1 photo
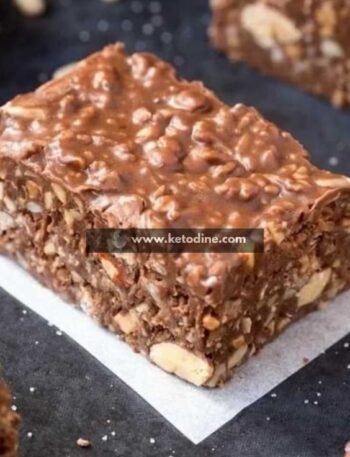
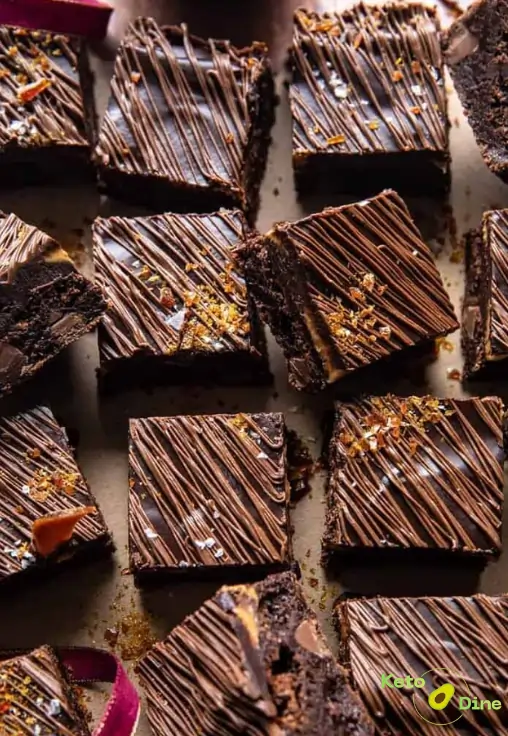
Imagine sinking your teeth into a rich, fudgy chocolate base topped with a velvety layer of creamy peanut butter. These low-carb desserts bring all the decadent, comforting flavors of your favorite candy store treats straight to your kitchen. Because we use premium sugar-free ingredients, you can satisfy your deepest sweet tooth cravings completely guilt-free. Consequently, this simple keto recipe delivers an incredibly luxurious texture that will impress everyone, whether they follow a low-carb lifestyle or not.
Milk Chocolate Peanut Butter Truffle Brownies Highlights
These outstanding bars combine an incredibly dense cocoa layer with a smooth, melt-in-your-mouth peanut butter truffle center. Furthermore, they are completely sugar-free, which keeps your blood sugar stable while delivering pure dessert bliss.
Why make my Milk Chocolate Peanut Butter Truffle Brownies recipe
- No fancy equipment needed: You only need a couple of basic mixing bowls and a standard baking pan.
- Perfect for meal prep: These bars slice beautifully and keep their rich texture in the fridge all week.
- Guaranteed crowd-pleaser: Your non-keto friends will never guess that this decadent treat is actually sugar-free.
- Fights sugar cravings fast: A single rich square completely satisfies your chocolate appetite for hours.
Does Milk Chocolate Peanut Butter Truffle Brownies Fit a Keto Lifestyle?
Yes, this decadent dessert fits into a low-carb routine perfectly. Each serving contains just 3 grams of net carbs, so it will not spike your insulin levels. By using sugar-free milk chocolate chips and erythritol, we naturally maximize flavor while minimizing the glycemic impact. Therefore, you can confidently enjoy these fudgy squares as a macro-friendly treat.
Why I Make This Milk Chocolate Peanut Butter Truffle Brownies on Repeat
I bake this specific dessert constantly because it satisfies my personal cravings without any guilt. In addition, the recipe relies on standard pantry staples that I always keep stocked in my kitchen. My family absolutely loves the rich combination of sweet chocolate and salty peanut butter, so a batch never lasts very long.
Why This Recipe is Special
- Incredibly low in net carbs: It provides a deeply satisfying dessert experience with only 3 grams of net carbs per square.
- Nutrient-dense fats: The base utilizes almond flour and real butter to keep you satisfied for hours.
- No cooling downtime required: You can enjoy these warm and gooey or fully chilled for a firmer truffle texture.
- Completely customizable: It allows you to easily swap the peanut butter for almond butter or sunflower seed butter.
My personal experience
- This recipe finally perfected the tricky texture of sugar-free baking. I spent weeks adjusting the almond flour ratio so the brownies would never turn out dry or crumbly.
- The layered peanut butter truffle filling was actually a happy kitchen accident. I originally wanted a simple swirl, but spreading it thick created a much more luxurious bite.
Perfect For
- Weekend meal prep: Slice them up on Sunday so you have macro-friendly desserts ready for the busy week ahead.
- Holiday dessert platters: These elegant, shiny layers look beautiful next to traditional high-carb holiday confections.
- Post-workout rewards: The healthy fats and moderate protein help refuel your body while feeling like a total cheat meal.
Why You’ll Love This Recipe
- Unbelievably fudgy texture: Every single bite melts in your mouth just like an expensive, gourmet chocolate truffle.
- Super simple prep work: You do not need any advanced baking skills to achieve beautiful, professional-looking layers.
Key Ingredients
I’ve included everything below to make this recipe easy to follow at home. For the full printable recipe instructions and ingredient quantities, scroll to the Recipe card at the bottom of this post.
Almond Flour. I highly recommend using a super-fine, blanched variety here. This ingredient provides the structure for our gluten-free base while keeping the texture incredibly soft and tender.
Sugar-Free Milk Chocolate Chips. Look for high-quality chips sweetened with stevia or erythritol. They melt down into a velvety glaze that gives the brownies their signature gourmet flavor profile.
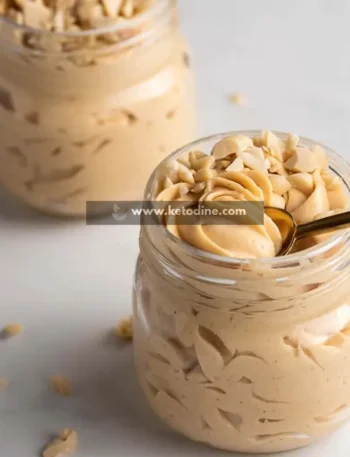
Creamy Peanut Butter. Make sure to choose an all-natural brand with no added sugars or extra oils. This ingredient creates the rich, salty truffle layer that contrasts beautifully with the sweet cocoa.
Erythritol Sweetener. A powdered or granulated keto-friendly sweetener works best in this batter. It provides the perfect amount of clean sweetness without leaving any unpleasant aftertaste behind.
How to make this Milk Chocolate Peanut Butter Truffle Brownies
I’ve included everything below to make this recipe easy to follow at home. For the full printable recipe instructions and ingredient quantities, scroll to the Recipe card at the bottom of this post.
Step 1- Melt the butter and sugar-free chocolate chips together in a heatproof bowl until completely smooth.
Step 2- Whisk the eggs and erythritol into the melted chocolate mixture until fully incorporated.
Step 3- Fold the blanched almond flour and cocoa powder gently into the wet ingredients to form a thick batter.
Step 4- Spread the chocolate batter evenly into a parchment-lined square baking pan.
Step 5- Bake at 350°F for twenty minutes until the edges are firm but the center remains slightly soft.
Step 6- Mix the creamy peanut butter with a little sweetener, then spread it smoothly over the cooled brownie layer.
Step 7- Drizzle extra melted chocolate over the top before chilling the bars in the refrigerator to set completely.
Common Mistakes to Avoid
- Overbaking the brownie base: If you leave them in the oven too long, they will become dry instead of fudgy.
- Using oily peanut butter: Excess surface oil will cause the truffle layer to separate and become messy.
- Slicing while still warm: The layers need time to chill thoroughly, otherwise the bars will fall apart.
Required Equipment
- 8×8 Inch Baking Pan: Provides the ideal thickness for the chocolate and peanut butter layers.
- Parchment Paper: Allows you to lift the entire block out effortlessly for clean slicing.
- Silicone Spatula: Helps scrape every bit of sticky batter out of the mixing bowl.
Caleb’s Recipe Tips
For the cleanest possible squares, wipe your knife with a warm, damp cloth between every single cut. Trust me, I learned this the hard way after muddying up my first few batches! Additionally, if your peanut butter layer feels a bit too thick to spread easily, just microwave it for ten seconds to soften it up. Finally, try sprinkling a few flakes of coarse sea salt over the top drizzle to make the chocolate flavor pop even more.
Storage Instructions
You should store any leftover brownie squares in an airtight container inside the refrigerator, where they will stay fresh for up to seven days. Alternatively, you can wrap individual bars tightly in plastic wrap and freeze them for up to three months. When you are ready to eat a frozen square, simply let it thaw on the counter for fifteen minutes before serving.
Milk Chocolate Peanut Butter Truffle Brownies
Description
These low-carb bars combine a rich chocolate brownie base with a velvety peanut butter truffle topping. Additionally, a beautiful sugar-free chocolate drizzle covers the surface to create an elegant, bakery-style finish. They offer the ultimate healthy indulgence that perfectly satisfies your sweet tooth without compromising your keto lifestyle goals.
Ingredients
Instructions
-
Preheat your oven to 350°F and line an 8x8 inch baking pan with parchment paper.
-
Combine the melted butter, eggs, vanilla extract, and erythritol sweetener in a large bowl, then whisk until smooth.
-
Stir the fine almond flour and unsweetened cocoa powder into the wet mixture until a thick batter forms.
-
Spread the chocolate brownie batter evenly into your prepared pan using a flexible silicone spatula.
-
Bake for exactly 18 to 20 minutes, ensuring the center is set but still soft to the touch.
-
Remove the pan from the oven and let the chocolate base cool completely to room temperature.
-
Warm your creamy peanut butter slightly, then spread it evenly over the entire surface of the cooled brownies.
-
Melt your sugar-free milk chocolate chips, drizzle them over the peanut butter layer, and chill for one hour before slicing.
Nutrition Facts
Servings: 8 ServingCalories:195kcalTotal Fat:17gCholesterol:45mgSodium:65mgPotassium:110mgTotal Carbohydrate:6gSugars: 1gProtein:5gCalcium: 35mg
Note
- Keep these treats refrigerated since the natural peanut butter layer will soften significantly at room temperature. If you prefer a warmer texture, you can microwave a single square for five seconds before eating. For a fun texture contrast, try tossing a handful of crushed sugar-free peanuts on top of the final glaze.
Pin this recipe to share with your friends and followers.

Frequently Asked Questions
Can I use coconut flour instead of almond flour?
No, because coconut flour absorbs far too much moisture and will make the brownies incredibly dry.
How do I keep the peanut butter layer from sticking to my spatula?
You can lightly spray your spatula with non-stick cooking oil before spreading the filling.
Are these brownies safe for a gluten-free diet?
Yes, this recipe naturally uses grain-free ingredients so it is completely safe for gluten sensitivities.
Why did my chocolate drizzle turn out clumpy?
The chocolate likely overheated, so make sure to melt it gently in short ten-second intervals.