

 View Gallery
1 photo
View Gallery
1 photo
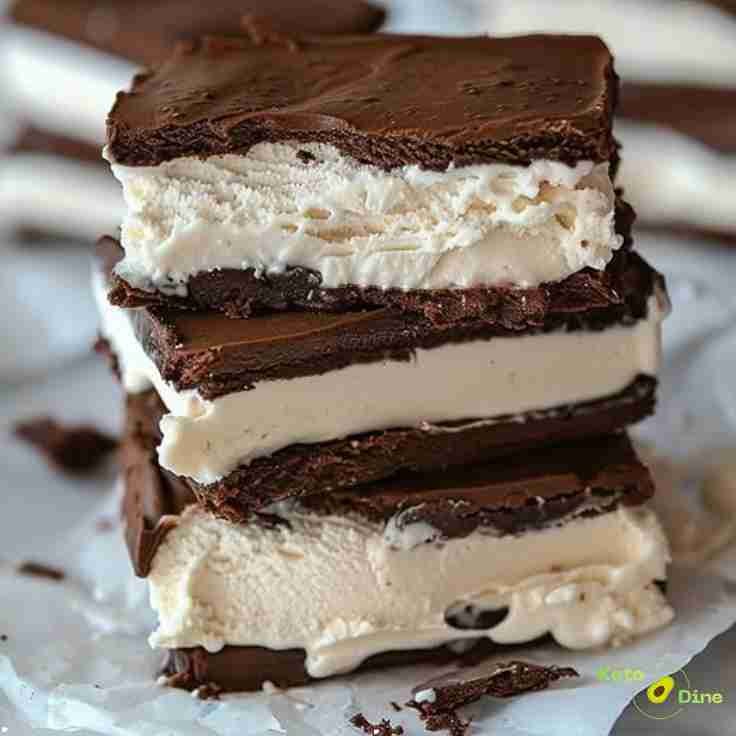
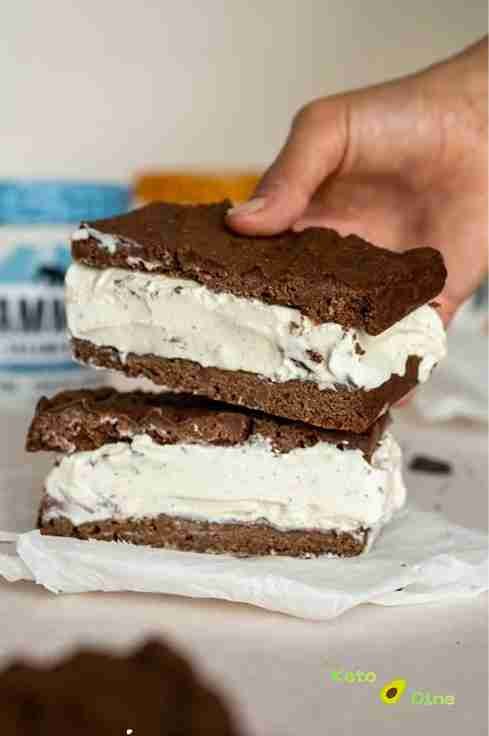
Indulge in the ultimate summer throwback with these Keto Ice Cream Sandwiches. They feature a soft, rich chocolate cookie exterior and a velvety vanilla cream center that melts perfectly on your tongue. It’s the kind of low-carb treat that makes you forget you’re even following a keto lifestyle, offering that classic nostalgic texture without any of the sugar spikes.
What are Keto Ice Cream Sandwiches?
This dish is a keto-friendly reimagining of the classic American freezer aisle staple. Traditionally made with high-sugar wafers and milk-based ice cream, our version uses almond flour-based cookies and a high-fat dairy or coconut cream filling. It delivers the same “grab-and-go” frozen dessert style while remaining strictly low-carb and gluten-free.
Keto Ice Cream Sandwich Recipe Highlights
- Soft-Bake Texture: The cookies stay soft even when frozen, so you won’t break a tooth.
- Sugar-Free Sweetness: Uses erythritol or monk fruit for a clean, sweet finish.
- Customizable Filling: Works with vanilla, chocolate, or even keto mint-chip centers.
- Kid-Approved: A family favorite that tastes just like the original versions.
Can This Recipe Support Weight Loss Goals?
By replacing refined sugars and high-glycemic flours with healthy fats and fiber-rich almond flour, this recipe helps maintain stable blood sugar levels. This stability is key for staying in a fat-burning state and avoiding the insulin spikes that lead to fat storage. It provides a satisfying, high-fat satiety that curbs late-night sugar cravings.
Does This Recipe Fit a Keto Lifestyle?
Absolutely, these sandwiches are designed with a focus on high-fat, moderate-protein, and very low net carbs. Each serving typically contains under 5g of net carbs, utilizing keto-compliant sweeteners and healthy fats from heavy cream or coconut. It’s a perfect way to hit your macros while enjoying a decadent dessert.
Why This Recipe is Special:
- Perfectly Portable: Easy to wrap individually for a quick, portion-controlled snack.
- No-Churn Option: The filling can be made without an expensive ice cream maker.
- Gluten-Free: Safe for those with gluten sensitivities or Celiac disease.
- High-Fat Satiety: Keeps you full and satisfied much longer than a standard sugary treat.
My Personal Experience
- The Softness Secret: I discovered that adding a touch of vegetable glycerin to the cookie dough keeps them perfectly soft in the freezer.
- Batch Prepping: I usually make a double batch on Sundays so I have a grab-and-go dessert ready for the whole week.
- Flavor Swirls: Swirling a bit of almond butter into the ice cream layer before freezing adds a delicious, salty kick.
Perfect For:
These are ideal for hot summer afternoon snacks, keto-friendly birthday parties, or as a pre-made meal prep dessert for busy weeknights. They also work great for family movie nights where you want a treat everyone can enjoy together.
Why You’ll Love This Recipe:
- Nostalgic Flavor: It tastes exactly like the ice cream sandwiches from your childhood, just without the sugar crash.
- Stress-Free Prep: The cookies bake quickly, and the assembly is straightforward enough for beginners.
Key Ingredients:
I’ve included everything below to make this recipe easy to follow at home. For the full printable recipe instructions and ingredient quantities, scroll to the Recipe card at the bottom of this post.
Almond Flour. This provides the structure for our soft cookies. It offers a mild, nutty flavor and a tender crumb that stays flexible when frozen.
Unsweetened Cocoa Powder. This is what gives the sandwiches that iconic dark look and rich chocolatey taste. Always reach for a high-quality Dutch-processed version for the best color.
Monk Fruit Sweetener. My go-to for a sugar-like sweetness without the aftertaste. It dissolves well in both the cookie dough and the ice cream filling.
Heavy Whipping Cream. This is the base for our “ice cream” center. It creates that luscious, fatty mouthfeel that defines a great frozen dessert.
Vanilla Extract. A splash of high-quality vanilla rounds out the flavors. It bridges the gap between the bitter chocolate and the sweet cream beautifully.
Common Mistakes to Avoid:
- Over-baking the cookies: If they get too crispy, they will crack when you try to bite into the sandwich.
- Warm Assembly: Ensure the cookies are completely cooled before adding the ice cream, or you’ll end up with a melted mess.
- Skipping the Freeze Time: Don’t rush the final freeze; the sandwiches need at least 4 hours to set properly.
Required Equipment:
- Baking Sheet: Provides an even surface for baking the cookie layers.
- Parchment Paper: Prevents sticking and makes it easy to lift the cookies off the tray.
- Electric Hand Mixer: Essential for whipping the cream to stiff peaks for the filling.
- Rectangular Mold or Pan: Helps shape the ice cream layer for uniform sandwiching.
Caleb’s Recipe Tips
- The “Lid” Trick: Press your thumb slightly into the center of the raw cookie dough before baking to keep them from puffing up too much. Trust me, I’ve learned this the hard way—domed cookies make for very wonky sandwiches!
- Quick Chill: Place your mixing bowl in the freezer for 10 minutes before whipping the heavy cream to get more volume and a firmer texture.
- Even Layers: Use an offset spatula to spread the ice cream filling; it’s the best tool for getting a perfectly flat, professional-looking middle.
- Salt is Key: Don’t skip the pinch of salt in the chocolate dough, as it intensifies the cocoa flavor and balances the sweetener.
Storage Instructions:
Store these sandwiches individually wrapped in plastic wrap or parchment paper inside an airtight container. They stay fresh and delicious in the freezer for up to 2 months. To enjoy, let them sit at room temperature for 2-3 minutes to soften slightly before eating.
Keto Ice Cream Sandwiches
Description
A classic frozen treat reimagined for the keto lifestyle. These sandwiches feature a rich, chocolatey exterior and a smooth vanilla cream filling that stays soft even when frozen.
Ingredients
Instructions
-
Prep: Preheat oven to 350°F and line a baking sheet with parchment paper.
-
Mix: Combine almond flour, cocoa, and sweetener; stir in melted butter and egg until a dough forms.
-
Bake: Roll dough between two sheets of parchment and cut into 16 rectangles. Bake for 8–10 minutes until set but still soft.
-
Whip: While cookies cool, whip heavy cream, vanilla, and extra sweetener to stiff peaks.
-
Assemble: Spread a thick layer of the cream mixture onto 8 cookies, then top with the remaining 8.
-
Freeze: Place on a tray and freeze for at least 4 hours until the center is firm.
Nutrition Facts
Servings: 4 ServingCalories:280kcalTotal Fat:26gCholesterol:65mgSodium:45mgPotassium:110mgTotal Carbohydrate:7gSugars: 1gProtein:5g
Note
Store in individual wraps to prevent freezer burn. If the cookies become too hard, let them thaw for 5 minutes. For an extra flavor boost, dip the edges in sugar-free chocolate chips.
Pin this recipe to share with your friends and followers.

Frequently Asked Questions
Can I use coconut flour instead of almond flour?
No, because coconut flour absorbs too much moisture and will make the cookies brittle.
How do I keep the ice cream from melting during assembly?
Make sure the cookies are completely cold and the whipped cream is very stiff.
Can I add chocolate chips?
Yes, sugar-free mini chips can be folded into the cream layer.
Do I need an ice cream machine?
No, the whipped cream method creates a perfect "no-churn" frozen texture.