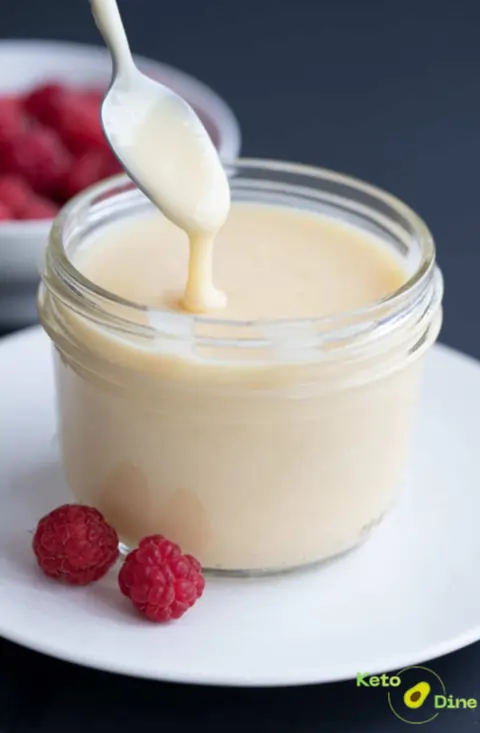
Finding a rich, velvety sweetener for low-carb baking can feel incredibly frustrating. Fortunately, this homemade sugar free condensed milk delivers the exact buttery, caramel-like flavor of traditional versions.
The texture turns out beautifully thick, glossy, and perfectly pourable after chilling. Consequently, you can finally enjoy decadent keto holiday desserts without spiking your blood sugar levels.
Recipe Highlights
- Incredibly Rich Texture: This sauce achieves a perfectly thick, spoonable consistency that mimics the classic canned version seamlessly.
- Only 3 Ingredients: You only need basic kitchen staples that are likely already sitting inside your pantry.
- Low Carb Staple: It contains minimal net carbs per serving, making it completely ideal for strict keto baking.
- Quick Customization: You can easily adjust the sweetness level or add various extracts to match your target dessert profile.
Why Make My Sugar Free Condensed Milk
- Ready quickly: The entire reduction process takes less than thirty minutes on your stovetop.
- Great for meal prep: You can easily store this staple in the fridge for up to two weeks ahead of time.
- Beginner friendly: The straightforward steps require absolutely no advanced confectionery or candy-making skills.
- No fancy equipment: A simple saucepan and a silicone spatula are the only tools required.
- Family approved: Everyone loves the rich, buttery sweetness, completely unaware that it contains zero added sugar.
Does Sugar Free Condensed Milk Fit a Keto Lifestyle?
This recipe fits into a keto lifestyle perfectly because it swaps out regular sugar for low-carb sweeteners. Heavy cream provides a rich source of healthy fats while keeping the overall net carb count exceptionally low. Therefore, a single serving won't kick you out of ketosis or disrupt your daily macro goals.
Why I Make This Sugar Free Condensed Milk on Repeat
I constantly keep a fresh jar of this sweet liquid gold stocked inside my refrigerator. Because it serves as the ultimate base for keto ice cream, fudge, and magic cookie bars, it saves massive amounts of prep time later. Furthermore, the rich, authentic flavor completely elevates standard low-carb baking to a professional bakery level.
Why This Recipe is Special
- Keto-friendly: The high-fat, ultra-low-carb profile aligns beautifully with standard ketogenic macro tracking guidelines.
- Quick: You can whip up a fresh batch significantly faster than driving to a specialty grocery store.
- Comforting: It brings back the nostalgic sweetness of classic holiday baking without the unwanted sugar crash.
- Meal-prep friendly: The mixture thickens beautifully over time, allowing you to prepare it well in advance.
- Beginner friendly: Minimal ingredients and simple temperature controls guarantee a foolproof kitchen experience.
My Personal Experience
- Stovetop Success: I discovered that keeping the heat low prevents the cream from scorching on the bottom. As a result, the mixture reduces evenly into a smooth, luxurious glaze every single time.
- Perfect Sweetener Balance: Testing different sugar alternatives revealed that powdered allulose prevents any unpleasant cooling effects or crystallization. Consequently, the cooled texture remains perfectly velvety even after days in the fridge.
Perfect For
- Weeknights: Whip up a quick batch to drizzle over fresh berries for a fast evening treat.
- Meal prep: Prepare this sweetener over the weekend so your holiday baking schedule runs completely smoothly.
- Holidays: Use this rich base to create incredible low-carb pumpkin pies and festive holiday fudges.
- Parties: Impress your guests by creating sugar-free coffee creamers or dessert dips for group gatherings.
- Breakfast: Drizzle a small spoonful over keto pancakes or waffles to elevate your weekend brunch experience.
Why You'll Love This Recipe
- Zero Sugar Aftertaste: Choosing the right sweetener ensures you get pure, clean sweetness without any bitter chemical lingering. Your family will honestly believe you are using traditional, sugar-laden store-bought canned milk.
- Endless Versatility: This liquid acts as a universal baking binder for dozens of low-carb dessert applications. It blends seamlessly into hot coffees, cold brews, batters, and frozen treats without breaking.
Key Ingredients
I’ve included everything below to make this recipe easy to follow at home. For the full printable recipe instructions and ingredient quantities, scroll to the Recipe card at the bottom of this post.
- Heavy Whipping Cream: Provides the decadent, high-fat foundation for the reduction process. It creates the ultimate buttery body and smooth mouthfeel. This dairy staple naturally keeps the recipe highly keto-compliant.
- Powdered Allulose: Acts as the main sugar substitute to deliver clean, gentle sweetness. It dissolves completely without leaving a grainy texture behind. Additionally, it helps caramelize the liquid slightly as it simmers.
- Unsalted Butter: Enhances the depth of flavor by introducing a rich, savory undertone. It assists in creating a glossy, shiny appearance. Moreover, it prevents the cream from drying out too quickly.
Ingredients & Substitutions
- Heavy Whipping Cream: This ingredient forms the structural base of the reduction. You can substitute it with full-fat canned coconut milk for a dairy-free alternative. However, coconut milk will impart a mild tropical flavor.
- Powdered Allulose: This sweetener keeps the mixture smooth and pourable when cold. You can use powdered erythritol instead, but it may crystallize slightly upon cooling. Do not substitute with liquid sweeteners.
- Unsalted Butter: Adds glossiness and a rich flavor profile. You can substitute this ingredient with refined coconut oil if you prefer a dairy-free version. This swap keeps the net carb count exactly the same.
How to Make Sugar Free Condensed Milk
I’ve included everything below to make this recipe easy to follow at home. For the full printable recipe instructions and ingredient quantities, scroll to the Recipe card at the bottom of this post.
- Combine the heavy whipping cream, powdered sweetener, and unsalted butter in a medium, heavy-bottomed saucepan.
- Place the pan over medium heat and stir gently until the butter melts completely.
- Bring the liquid to a gentle simmer, then immediately reduce the heat to low.
- Simmer gently for approximately 25 minutes while stirring frequently to prevent scorching on the bottom.
- Remove the pan from the heat once the liquid reduces by half and coats the back of a spoon.
- Pour the hot mixture into a clean glass jar and let it cool completely at room temperature.
- Seal the jar tightly and place it in the refrigerator to thicken into a glossy, spreadable texture.
Pro Tip: Always use a silicone spatula to scrape down the sides of the pan frequently during the simmering process to prevent hard sugar crystals from forming.
Common Mistakes to Avoid
- Using Excess Heat: Boiling the cream too rapidly will cause the dairy to separate or scorch instantly.
- Granulated Sweeteners: Utilizing granulated erythritol results in a gritty, crunchy texture once the condensed milk cools down.
- Rushing the Cooling Phase: Skipping the room temperature cooling step before refrigeration can cause unwanted condensation and separation.
- Leaving the Pan Unattended: Failing to stir regularly allows a tough skin to form across the surface of the reducing cream.
Required Equipment
- Heavy-Bottomed Saucepan: Distributes heat evenly to prevent the delicate dairy proteins from burning.
- Silicone Spatula: Allows you to cleanly scrape the bottom and sides of the pan continuously.
- Glass Mason Jar: Provides an airtight, non-reactive vessel for safe cooling and long-term refrigeration.
Caleb's Recipe Tips
- Add Vanilla Extract: Stir in a teaspoon of pure vanilla extract after removing the pan from the heat for extra warmth.
- Watch the Color: Look for a beautiful, light ivory hue to develop as the mixture finishes reducing.
- Sift the Sweetener: Run your powdered sweetener through a fine-mesh sieve to eliminate any stubborn lumps before cooking.
- A Pinch of Salt: Add a tiny pinch of sea salt to balance the sweetness and enhance the buttery notes.
Pro Tips for Best Results
- Maintain Low Temperatures: Keep the stovetop flame at the lowest possible setting to ensure a perfectly smooth reduction.
- Measure by Volume Reduction: Verify the mixture has reduced by roughly half before turning off the stovetop heat.
- Account for Post-Cooling Thickening: Remove the sauce from the stove while it is still pourable, as it hardens substantially in the fridge.
- Strain if Needed: Pass the finished liquid through a fine strainer if any tiny dairy bits form during cooking.
- Choose Allulose First: Prioritize allulose over other sweeteners because it mimics the exact chemical behavior of real sugar.
- Avoid Aluminum Pans: Use stainless steel or ceramic cookware to prevent any metallic flavors from leaching into the cream.
Storage Instructions
Store your finished sugar free condensed milk inside an airtight glass jar placed in the refrigerator. It stays fresh, thick, and delicious for up to two full weeks. If you want to keep it longer, freeze the mixture in silicone molds for up to three months. Simply thaw the portions overnight in the fridge and stir well before using.
Serving Ideas
- Coffee Creamer: Stir a generous tablespoon into your hot morning coffee or iced espresso drinks.
- Berry Drizzle: Pour the chilled sauce over fresh raspberries or strawberries for a quick keto dessert.
- Low-Carb Ice Cream: Use this mixture as the sweet, creamy base for no-churn ketogenic vanilla ice cream.
- Keto Fudge: Combine it with melted sugar-free dark chocolate chips to create a rapid, decadent low-carb fudge.
- Pancake Topping: Drizzle it over warm almond flour pancakes for a luxurious weekend breakfast treat.