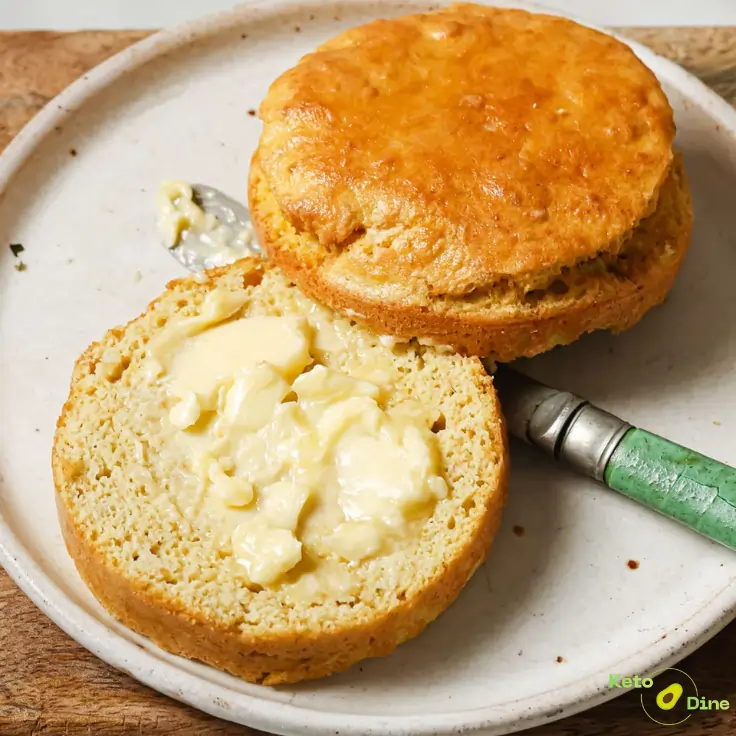
Finding a decent low-carb bread alternative can often feel like a massive challenge. However, this quick recipe completely changes the game by delivering a warm, comforting slice in ninety seconds.
Meanwhile, the texture remains surprisingly fluffy and tender instead of becoming dense or rubbery. This microwave bread boasts a mild, buttery flavor that mimics traditional white bread beautifully. Consequently, you can finally enjoy toast, sandwiches, or morning sliders without throwing off your macro goals.
Recipe Highlights
This single-serve option completely eliminates the need for tedious kneading, yeast proofing, or lengthy baking times. Additionally, it relies on simple pantry staples that you likely already have stocked in your kitchen.
Why Make My Keto Mug Bread
- Ready quickly in under two minutes from start to finish.
- Beginner friendly with zero advanced baking skills required.
- No fancy equipment needed besides a standard microwave-safe mug.
- Budget friendly since it utilizes basic low-carb baking staples.
- Portion controlled so you never have to worry about wasting a whole loaf.
Does Keto Mug Bread Fit a Keto Lifestyle?
This recipe fits into a ketogenic diet flawlessly because it contains minimal carbohydrates. Specifically, each serving delivers just two grams of net carbs. The inclusion of healthy fats from butter and almond flour helps keep you full. Therefore, you can confidently integrate this quick bread into your daily low-carb routine.
Why I Make This Keto Mug Bread on Repeat
I rely on this recipe constantly because my mornings are usually incredibly hectic. Consequently, I rarely have time to prepare complex breakfasts from scratch. This single-serving bread allows me to enjoy a warm savory toast alongside my morning coffee. Furthermore, cleanup takes less than a minute, which makes my daily routine much smoother.
Why This Recipe is Special
- Keto-friendly macros keep your blood sugar steady.
- Quick preparation satisfies your sudden bread cravings instantly.
- Comforting texture provides the nostalgic chew of traditional baked goods.
- Gluten-free ingredients make it safe for sensitive stomachs.
My Personal Experience
- The First Attempt: I initially expected a spongy texture, but the result turned out remarkably light and airy instead.
- Weekly Routine: This recipe became my ultimate savior whenever I forgot to prep my meals for the busy week ahead.
- The Toast Test: Slicing the bread in half and searing it in a hot skillet completely transformed my morning breakfast routine.
Perfect For
- Breakfast on busy weekdays when you need fuel fast.
- Lunches as a quick base for a turkey and cheese sandwich.
- Weeknights when you want a speedy side for your favorite soup.
Why You'll Love This Recipe
- Incredibly simple measurements mean you can memorize the steps after making it just once.
- Highly customizable base allows you to add any herbs or spices you prefer.
Variations You Can Try
- Extra cheesy: Mix in a tablespoon of sharp cheddar cheese before cooking for a savory kick.
- Garlic herb: Add a pinch of garlic powder and dried rosemary to create a fragrant dinner roll.
- Dairy-free: Substitute the melted butter with melted coconut oil or avocado oil to avoid dairy.
- Everything bagel: Sprinkle everything bagel seasoning over the top right before placing it into the microwave.
- Sweet cinnamon: Incorporate a sugar-free sweetener and cinnamon to satisfy your morning sweet tooth.
Key Ingredients
I’ve included everything below to make this recipe easy to follow at home. For the full printable recipe instructions and ingredient quantities, scroll to the Recipe card at the bottom of this post.
- Almond Flour: This ingredient acts as the main structural base. It provides a tender, cake-like crumb while keeping the overall carbohydrates incredibly low.
- Egg: The egg acts as the primary binding agent. It provides essential lift, structure, and a rich color during the short microwave process.
- Melted Butter: This component adds essential moisture and richness. It delivers a traditional buttery flavor that masks the taste of the egg.
- Baking Powder: This leavening agent creates necessary air pockets. It ensures the batter rises quickly and stays light instead of becoming dense.
Ingredients & Substitutions
- Almond Flour: You can substitute this with one tablespoon of coconut flour. However, coconut flour absorbs significantly more moisture, so the texture will become denser.
- Melted Butter: Ghee or avocado oil work beautifully as direct replacements. These alternatives will slightly alter the flavor profile but keep the macros identical.
- Egg: You should not substitute the egg in this specific single-serve recipe. Without it, the bread will fail to hold its shape and will crumble completely.
How to Make Keto Mug Bread
I’ve included everything below to make this recipe easy to follow at home. For the full printable recipe instructions and ingredient quantities, scroll to the Recipe card at the bottom of this post.
- Whisk the melted butter and large egg together inside your mug for thirty seconds until smooth.
- Stir in the almond flour, baking powder, and a pinch of salt until a uniform batter forms.
- Microwave the mixture on high for ninety seconds until the top looks completely set and firm.
- Cool the mug for one minute before carefully sliding the bread out onto a cutting board.
Pro Tip: Slice the bread in half and toast it in a skillet with extra butter for a crispy exterior.
Common Mistakes to Avoid
- Using a mug that is too narrow: This causes the bread to rise unevenly and cook improperly.
- Overcooking the batter: Leaving it in the microwave too long results in a tough, rubbery texture.
- Skipping the salt: Omitting salt entirely leaves the bread tasting quite bland and overly eggy.
Required Equipment
- Microwave-Safe Mug: This serves as both the mixing bowl and the baking vessel for ultimate convenience.
- Small Whisk: It ensures the egg and dry ingredients combine thoroughly without leaving any flour lumps.
Caleb's Recipe Tips
- Grease the mug well with non-stick spray to ensure the bread slides out easily without sticking.
- Tap the mug gently on the counter before cooking to release any trapped air bubbles inside.
- Let it cool slightly before slicing so the interior structure sets completely and doesn't tear.
- Use superfine almond flour instead of coarse almond meal to achieve the best possible bread texture.
Pro Tips for Best Results
- Measure your baking powder precisely to prevent a bitter aftertaste in the finished bread.
- Ensure your egg is at room temperature so it emulsifies smoothly with the melted butter.
- Check the microwave power settings because a higher wattage might require a shorter cooking time.
- Slice the bread horizontally using a sharp serrated knife to get two perfect sandwich rounds.
- Add a dash of onion powder if you want to reduce the natural egg flavor significantly.
High-Protein Nutrition & Strategy
This bread naturally contains a decent amount of protein thanks to the whole egg and almond flour base. If you want to increase the protein content further, consider adding a tablespoon of unflavored whey protein isolate. Meanwhile, pairing this bread with smoked salmon, lean turkey, or egg whites creates a highly satisfying, macro-friendly meal.
Storage Instructions
- Refrigerator storage: Place the cooled bread inside an airtight container for up to three days.
- Freezer storage: Wrap the sliced rounds tightly in plastic wrap and freeze them for one month.
- Reheating tips: Toast the slices directly from the fridge or freezer in a standard toaster until hot.
Serving Ideas
- Avocado Toast: Top with mashed avocado, red pepper flakes, and a squeeze of fresh lemon juice.
- Breakfast Slider: Layer a fried egg, crispy bacon, and cheddar cheese between the toasted halves.
- Soup Sidekick: Serve it warm alongside a bowl of low-carb tomato basil soup for dipping.
- French Toast: Dip the slices into an egg wash and fry them for a sweet breakfast treat.
- Garlic Bread: Spread garlic butter on top and broil for a few minutes until golden.