 View Gallery
1 photo
View Gallery
1 photo
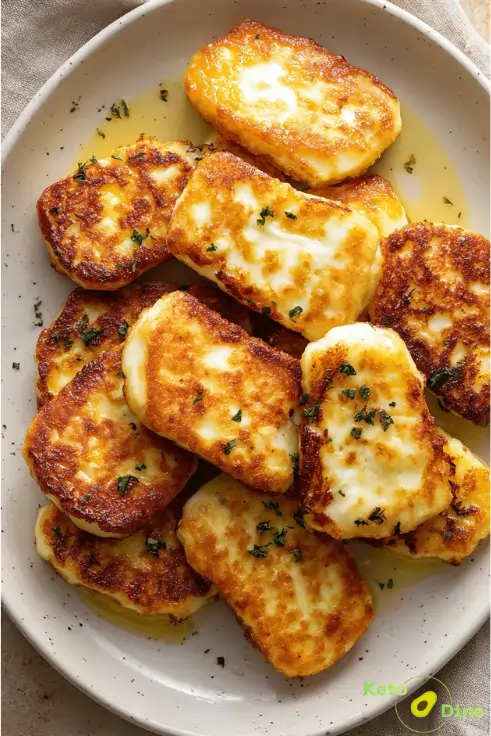
3-Ingredient Pan-Fried Halloumi Highlights
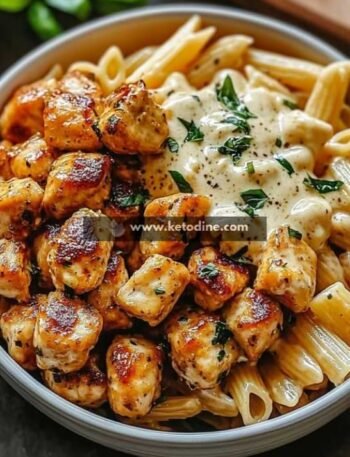
This recipe transforms simple cheese into a warm, savory masterpiece. Because halloumi has a remarkably high melting point, it develops a stunning, deeply caramelized crust while maintaining its signature chewy interior. A drizzle of rich olive oil and a sprinkle of fresh herbs tie everything together beautifully. Consequently, you get an elegant, low-carb appetizer that satisfies your salty cravings instantly.
Why make my 3-Ingredient Pan-Fried Halloumi recipe
- Ready in 10 minutes: This ultra-fast appetizer comes together quickly when hunger strikes.
- Minimal cleanup needed: You only need a single non-stick skillet to achieve perfect results.
- Naturally low-carb: It serves as a fantastic, satisfying keto snack with zero effort.
- Incredibly versatile: You can toss it into vibrant salads, stack it in wraps, or enjoy it warm right off the pan.
Does 3-Ingredient Pan-Fried Halloumi Fit a Keto Lifestyle?
Yes, this dish fits perfectly into a strict keto or low-carb lifestyle. Halloumi cheese is naturally packed with healthy fats and rich proteins, while containing virtually zero net carbohydrates. Because we only add olive oil and fresh herbs, the entire dish remains completely free of hidden sugars or unnecessary fillers. Therefore, it helps you hit your daily macro goals effortlessly.
Why I Make This 3-Ingredient Pan-Fried Halloumi on Repeat
I find myself making this dish constantly because it delivers maximum flavor with minimal effort. Whenever I need a savory keto-friendly bite, this salty, crispy cheese satisfies my cravings much better than processed snacks.
Why This Recipe is Special:
- Perfect texture contrast: It delivers an incredibly crunchy outer crust paired with a warm, pillowy, squeaky interior.
- Naturally gluten-free: This simple recipe requires absolutely no flour coatings or breading to get beautifully golden.
- High-quality protein: It provides a wonderful, vegetarian-friendly protein boost that keeps you full for hours.
- Crowd-pleasing flavor: Everyone loves warm cheese, so it always disappears first at dinner parties.
My personal experience
- The ultimate late-night savior: Whenever I crave something savory and comforting after a long workday, flipping a few slices of this cheese in a hot pan instantly hits the spot.
- A guaranteed party hit: I once served this platter at a casual gathering, and my non-keto friends devoured every single piece before the main course was even ready.
Perfect For:
This dish is ideal for busy weeknights when you want a quick, elegant side item. Additionally, it works beautifully for weekend brunch spreads, low-carb meal prepping, or as a warm element tossed into fresh Mediterranean salads.
Why You’ll Love This Recipe:
- Unbelievably simple process: You do not need any advanced culinary skills to master the perfect golden sear on these cheese slices.
- Deeply comforting taste: The natural saltiness of the cheese paired with warm oil creates a genuinely satisfying, indulgent flavor profile.
Key Ingredients
I’ve included everything below to make this recipe easy to follow at home. For the full printable recipe instructions and ingredient quantities, scroll to the Recipe card at the bottom of this post.
- Halloumi Cheese: This is the star of the show. I prefer using block halloumi made from a blend of sheep and goat milk. It holds its shape perfectly under high heat, creating that legendary crispy crust and wonderfully squeaky bite.
- Olive Oil: A splash of extra virgin olive oil prevents sticking. It enhances the rich, Mediterranean flavor profile of the cheese. You can substitute avocado oil if you prefer a higher smoke point.
- Fresh Parsley: Chopped herbs add a beautiful pop of color. They cut through the rich, salty elements of the pan-seared cheese. Feel free to use fresh mint or dried oregano instead.
How to make this 3-Ingredient Pan-Fried Halloumi
I’ve included everything below to make this recipe easy to follow at home. For the full printable recipe instructions and ingredient quantities, scroll to the Recipe card at the bottom of this post.
Step 1- Slice the halloumi block evenly into thick, uniform rectangles.
Step 2- Pat each cheese slice thoroughly with a clean paper towel to remove excess moisture.
Step 3- Heat the olive oil in a heavy-bottomed non-stick skillet over medium-high heat.
Step 4- Place the cheese slices carefully into the hot pan in a single layer.
Step 5- Sear the slices for two minutes until a rich, golden crust forms underneath.
Step 6- Flip the pieces gently and cook the second side for another minute.
Step 7- Transfer the warm cheese to a plate and garnish immediately with chopped parsley.
Common Mistakes to Avoid:
- Slicing the cheese too thin: If you cut the pieces too thin, the cheese will melt completely and lose its structural integrity before browning.
- Skipping the drying step: Leaving the cheese wet causes it to steam rather than sear properly.
- Crowding the skillet: Placing too many slices in the pan drops the temperature, which prevents that coveted crispy exterior from developing.
Required Equipment:
- Non-stick skillet: Prevents sticking and ensures even, beautiful browning across the cheese surface.
- Paper towels: Crucial for drying the cheese properly to achieve a perfect crispy crust.
- Thin spatula: Allows you to flip the delicate, warm cheese slices without breaking them.
Caleb’s Recipe Tips
Make sure your skillet is truly hot before adding the cheese to the pan. If the oil isn’t sizzling slightly, the halloumi will release water and simmer instead of searing, so test a small corner first. Furthermore, do not leave the stove during the process because this cheese transitions from perfectly golden to overly burnt in just a matter of seconds. Trust me, I’ve learned this the hard way after ruining a great batch!
Storage Instructions:
You should store any leftover halloumi in an airtight container inside the refrigerator for up to three days. However, I highly recommend enjoying this dish fresh because the texture becomes quite rubbery as it cools down. If you must save it, gently reheat the slices in a dry skillet over medium heat for a minute on each side to restore the soft interior. Freezing is not recommended for this specific recipe.
3-Ingredient Pan-Fried Halloumi
Description
This incredibly fast appetizer features thick slices of halloumi cheese seared to absolute perfection. It requires just three simple pantry ingredients to deliver an authentic, restaurant-quality Mediterranean experience at home. Consequently, it makes the ultimate quick addition to your keto lifestyle.
Ingredients
Instructions
-
Slice your halloumi block into equal, thick portions. Afterward, press them firmly between paper towels to remove all surface moisture.
-
Heat your olive oil in a large non-stick skillet over medium-high heat until it shimmers beautifully.
-
Arrange the dried cheese slices in the skillet, ensuring they do not touch each other.
-
Cook undisturbed for 2 to 3 minutes until you see a rich, deep golden crust forming on the bottom edges.
-
Flip each piece carefully with a spatula. Then, cook the reverse side for an additional 1 to 2 minutes until it feels soft and pliable.
-
Remove the skillet from the heat source immediately. Finally, transfer the golden cheese to a serving dish and scatter fresh herbs over the top.
Nutrition Facts
Servings: 4 ServingCalories:190kcalTotal Fat:16gCholesterol:45mgSodium:620mgPotassium:30mgTotal Carbohydrate:1gProtein:11gCalcium: 300mg
Note
If you want a dynamic flavor boost, try squeezing a fresh lemon wedge over the hot cheese right before serving. For storage, keep leftovers refrigerated in a sealed container, but remember that the signature squeak is best experienced straight from the pan. If you have a dairy allergy, this recipe is unfortunately not suitable for your dietary needs.
Pin this recipe to share with your friends and followers.
Frequently Asked Questions
Why does halloumi cheese squeak when you eat it?
The unique protein structure of the cheese resists melting, which creates a firm, rubbery texture that vibrates against your teeth.
Can I fry halloumi without using oil?
Yes, you can dry-fry it because the cheese itself releases a good amount of natural fat during the cooking process.